Recording Your Broadcasts
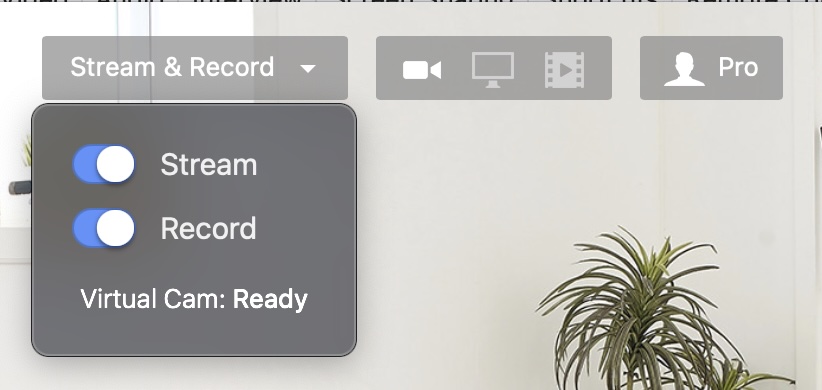
By default, Ecamm Live keeps a local, full-quality recording of every broadcast you produce through the app. To turn recording off or on, click the Mode menu at the top of the Main Window, and you’ll see a Record option there.
Isolated Video Recording (Pro Only)
In addition to normal recording, Ecamm Live can save a recording of up to three camera sources. It can also record the audio and video from Interview guests and Zoom guests. Isolated video recording can be turned on in the Recording section of the app preferences.
An Apple Silicon (M-series) Mac is required for isolated video recording.
Isolated Audio Recording (Pro Only)
Ecamm Live can save audio recordings of your audio channels such as primary microphone, secondary microphone, sound effects, and individual Interview guests and Zoom guests. This can be turned on in the Recording section of the app preferences.
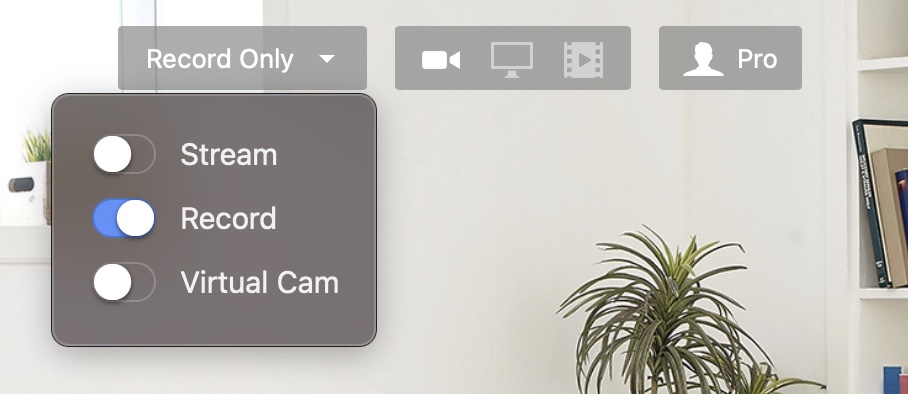
Record-Only Mode
Ecamm Live features a mode to record locally only. When you choose this mode, all features that are not service-specific are available for you to record a video offline. This is great for a number of tasks, such as practicing before doing a live broadcast, pre-recording sections of a broadcast for later use, or simply to create videos for non-streaming situations like vlogs or tutorials.
To enable Record-Only mode, click the Mode menu at the top of the Main Window, and then turn off Stream.
When in Record-Only mode, you’ll see a Record button at the bottom of the Main Window. Click to begin recording. Record-Only mode has an optional 3-second countdown before recording starts. You can also optionally name your recording either at the beginning or end of your recording.
Adding Markers
At any time during the broadcast, you can add a Marker by picking Add Marker With Info from the Recording menu at the top of the screen. Or, press shiftM. Enter some text for the marker and press return. The marker text and an associated time stamp are added to a text file, which is saved alongside your recording file.

Starting a New Recording
During a recording, you may wish to end the current recording and start a new recording. (For example, if you need to review the recording or re-play it.) To do this, pick Start New Recording from the Ecamm Live menu at the top of the screen.
After a Recording
After clicking Finish when in Record-Only mode, Ecamm Live will present you with a message confirming your recording has ended, and offer several options for your next steps.

Show File - click to reveal the recording file in the Finder.
Delete File - click to delete the recording.
Send to OpusClip - click to send the recording to OpusClip to create quick edits.
Send to Descript - click to send the recording to Descript for editing and transcription.
Send To YouTube - click to send the recording to a YouTube channel.
Retrieving Your Past Recordings
The Recording Menu at the top of your display holds the tools you need to enable or disable automatic recording, a way to get at your past recordings, and even change the location of where you want your recordings saved. By default, Ecamm Live saves your recorded videos in a subfolder of your macOS user’s Movies folder.
You can also find your recordings by typing ⌘shiftR.
You may change your Recordings storage location by selecting Recording ➝ Choose Recordings Folder… from the menu bar at the top of your display.