Video File Mode
When you need to play a video file within your live broadcast, use the third icon in the Sources Bar, the icon. Clicking this the first time will display a file browser, allowing you to locate and select a video file for feedback.
On subsequent clicks of the Video icon, you’ll see a menu appear instead, with additional options. Choose File... brings up the File Browser to choose a new video. A Recent section lists any videos you’ve recently selected. Selecting a video from this list will immediately play the video filling your broadcast window. If your Recent Videos section needs a clean up, select Clear Recent Items.
Your video will begin playing immediately after selection. If you would prefer to disable autoplay, you may do so in the Video section of the Preferences.
Starting A Video File
By default, videos will start playing from the beginning. If you’d prefer that a video starts from where you left off previously, choose Options menu ➝ When Video Scene Starts ➝ Start Video From Last Location.
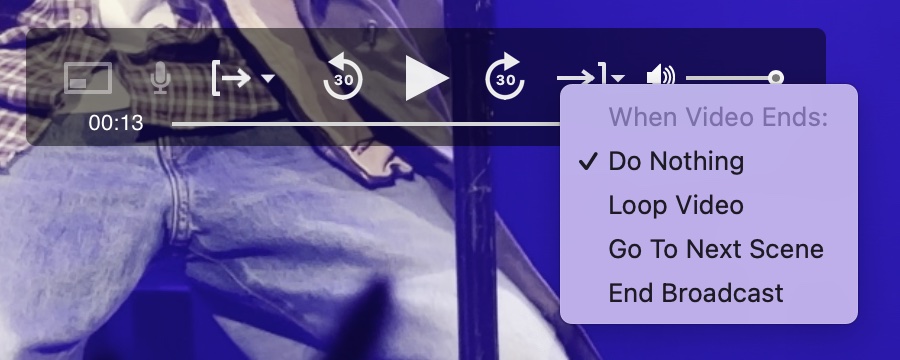
This menu can also be found in the player bar.

When A Video File Ends
If you’d like to have the selected video start over automatically as soon as it finished, choose Options menu ➝ When Video Ends ➝ Loop Video.
If you’d like to go to the next Scene when the video finishes, choose Options menu ➝ When Video Ends ➝ Go To Next Scene.
If you’d like to automatically end the broadcast or recording when the video finishes, choose Options menu ➝ When Video Ends ➝ End Broadcast.
This menu can also be found in the player bar.

Audio from the video will be broadcast automatically. Your microphone will be automatically muted if a Picture in Picture box for your camera is not present. Read the Picture-in-Picture section for full details.
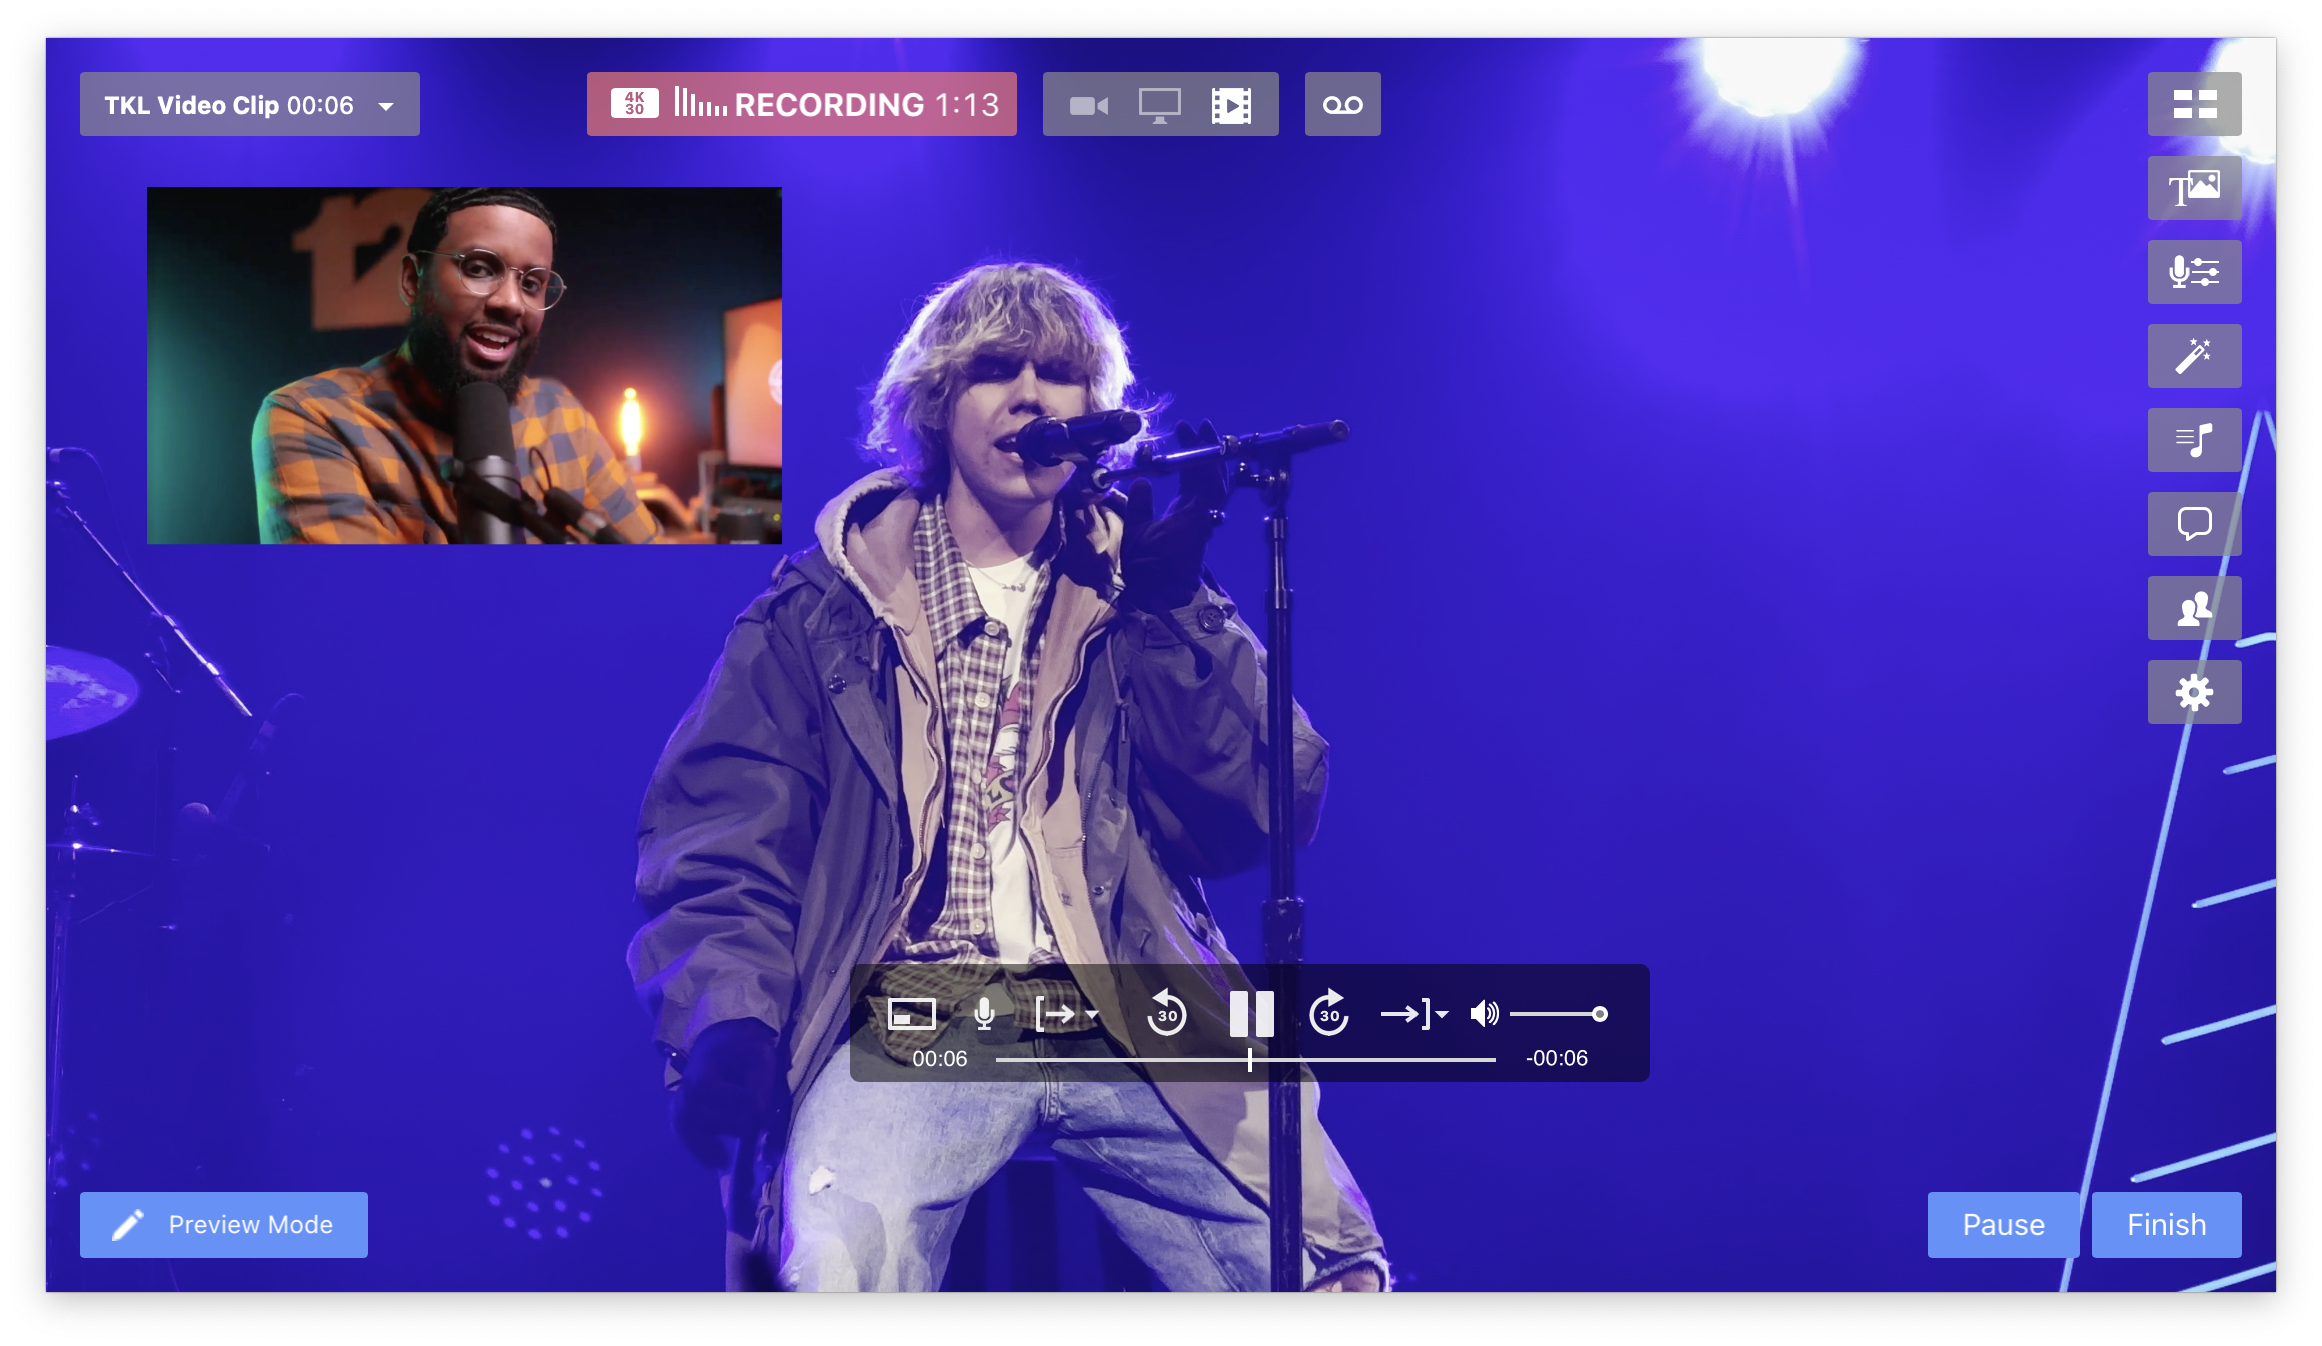
While the video plays, you can control it with the Video Control Bar. Only you can see the controller. It is invisible to your audience. You can drag this control bar around the window if it’s blocking your view. The bar fades in and out depending on the movement of your cursor. Audio from the video file can be monitored and adjusted in the Sound Levels Window.
We are not lawyers, but when playing videos you did not create yourself, be aware of copyright law and usage rights in your jurisdiction.
Picture in Picture
Picture-in-Picture can be summoned or dismissed by clicking the leftmost icon in the onscreen controls, or using the Options menu ➝ Show Picture-in-Picture. The PiP box can be moved anywhere within the Main Window. It features a mute toggle button only visible to you, for your microphone. You can change the size of the PiP by dragging the bottom right corner of it.
You can change the shape of the PiP window Options ➝ Picture-in-Picture Shape, or by right-clicking or control-clicking on the PiP window. Shape options include a rectangle, square or circle.
Swapping the Picture in Picture and the Video
To swap the camera video and the pre-recorded video, click the small button in the Picture in Picture window. This will allow you to play a pre-recorded video as a Picture in Picture.
Automatic Mic Muting
In video playback mode, your microphone and Interview guest audio are automatically muted when the PiP window is not on screen. Only the video’s audio will play. When the PiP window is brought back, your audio is automatically unmuted. You can unmute (and mute again) your mic audio while a video is playing and the PiP is hidden by clicking the microphone icon within the video control bar, or by using the MUTE buttons in the Sound Levels window. This feature can be deactivated in the Audio section of the preferences.

