Adjusting Sound Levels
If you don’t see the Sound Levels window on the screen, click the button in the top-right corner of the Main Window to show it.
You can also find the Sound Levels window in the Window menu at the top of the display, or by typing ⌘'.
The Sound Levels Window shows what audio source is in use. Clicking on the name of the source will show you any other available sources. The Mic menu at the top of your display also provides options, including the Mute Microphone option— shift⌘M.
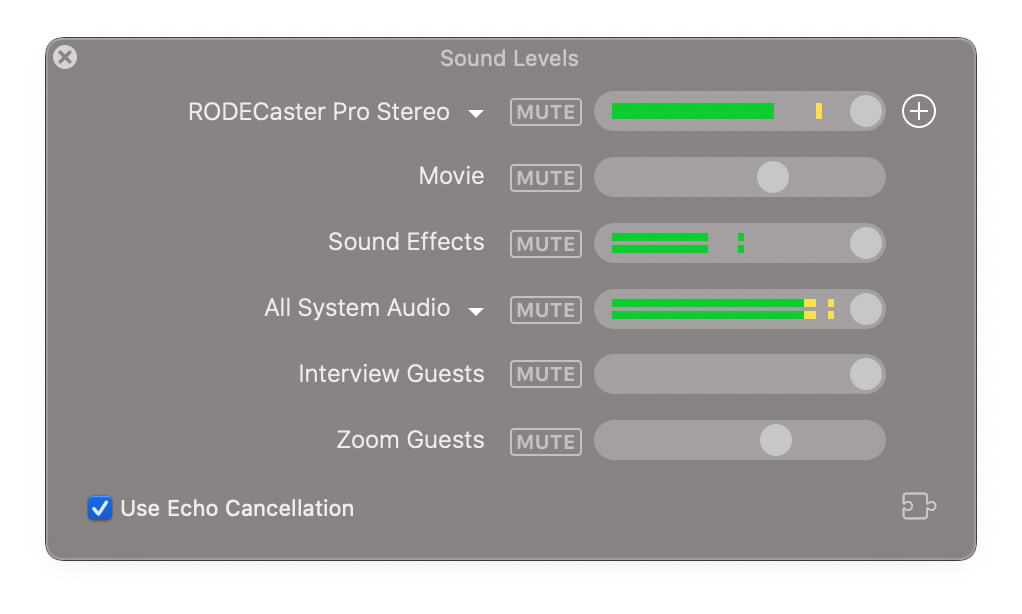
A meter in the Sound Levels Window will show the currently selected source’s volume level. You can adjust this with the slider. When sharing your screen, you’ll also see a sound level adjustment for System Audio.
Each audio channel (microphone, movie audio, Interview mode, Sound Effects, Zoom audio, and System Audio) can be muted using the Sound Level window’s MUTE buttons. These mute setting will be saved in the Scene. For example, you may have an Interview guest online, but only unmute the guest’s audio in particular Scenes.
Adding a Second Audio Input
If Ecamm Live detects a second audio input, for example a second USB microphone, you’ll see a button show up in the Sound Levels window. Click this to add a second audio input.
To remove the secondary audio input, click the button.
When an iOS device is connected, Ecamm Live will automatically add it as a second audio device. You will also see a checkbox and popup menu to configure audio play-through for the iOS device. This will allow you to hear sound from the iOS device on your Mac’s speakers or a headset.
Capturing System Audio
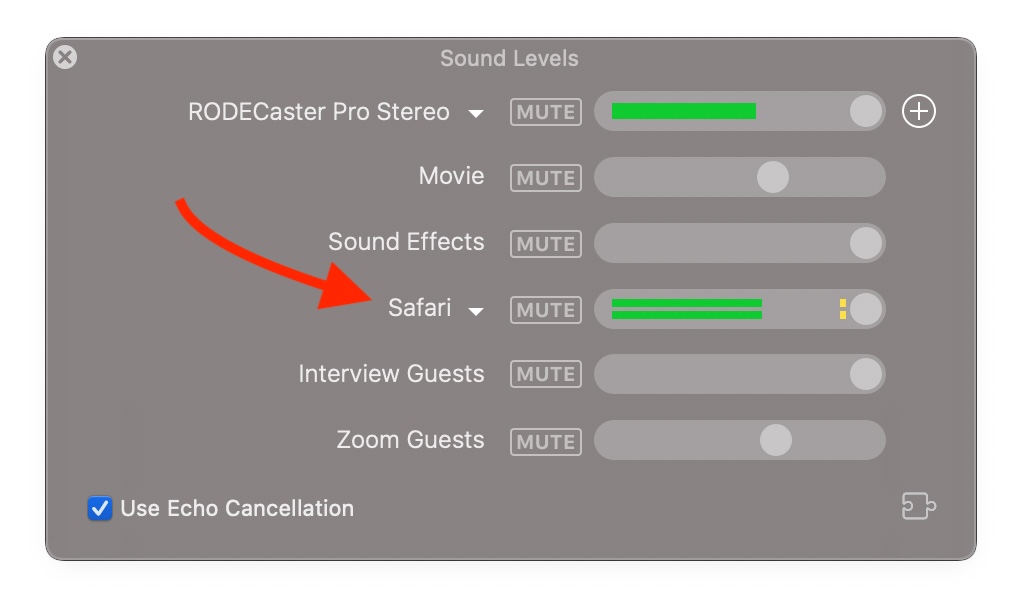
If Broadcast System Audio is turned on in the Audio preferences, you will see system sound levels shown in this window, including a popup menu to select which Mac application’s audio should be captured. (Note that this menu is only available when using macOS 14.4 or newer.)
Mapping Audio Channels for Stereo
Ecamm Live will automatically broadcast System Audio and movie playback audio in stereo. Audio from a connected microphone or mixer works a bit differently.
By default, Ecamm Live will mix all of an input device’s channels together. However, if you are using a stereo audio input, you may wish to map channels 1 and 2 to left and right stereo. Do this using the Map Input Channels 1 And 2 To Left And Right Stereo checkbox in Ecamm Live’s Audio Preferences.
Note that when Echo Cancellation is enabled, Ecamm Live will only use audio on channel 1 of multi-channel audio input devices, so stereo audio will not be available.
Mapping Audio Channels from Multi-Channel Audio Devices
If Ecamm Live detects a multi-channel audio device, (an audio device with more than two channels), a channel mapping icon will show up. Click this icon to view the channel mapping popover. Each channel can be mapped to Off, Mono, Left, or Right.
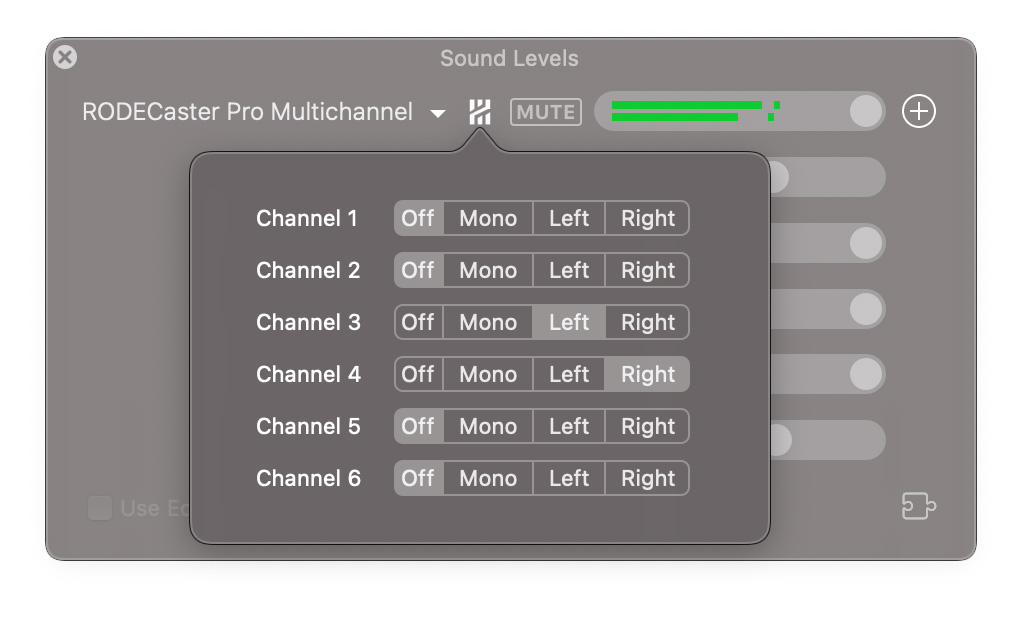
Note that this feature will not be available if Echo Cancellation is activated.
Stereo for Interview Guests
Ecamm Live provides the option for Interview guests to connect in stereo, however the guest must use Chrome on a desktop computer, and audio processing must be disabled.
Echo Cancellation
If you are using your Mac’s speakers during your broadcast, that may cause an echo if your mic picks up speaker audio. To prevent this, Ecamm Live has Echo Cancellation, which you can enable or disable using the checkbox in the Sound Levels window. Echo Cancellation listens for sounds produced by your speakers and removes it from your broadcast. It works remarkably well, most of the time. If your audience is reporting missing sound, try turning off this feature.
If you are using headphones, echo cancellation is disabled automatically. Note that Ecamm Live can’t distinguish between headphones and external computer speakers. If you are using external computers speakers, and you wish to use Echo Cancellation, you will need to turn on the Enable Echo Cancellation for External Speakers checkbox in the Audio section of the Preferences.
When Echo Cancellation is enabled, Ecamm Live will only use audio on channel 1 of multi-channel audio input devices. If your audio interface has more than one channel, be sure to turn off Echo Cancellation.
Audio Filters
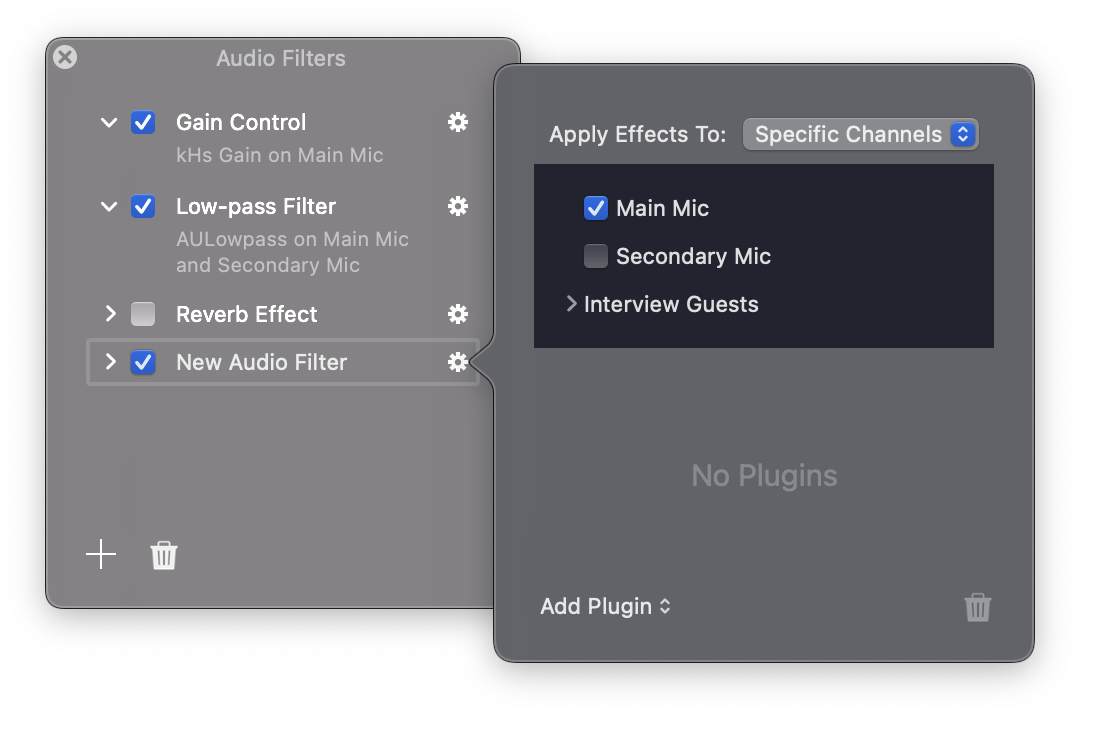
Ecamm Live’s Audio Filters window allows you to apply any installed AU Component audio plugins to the primary mic, secondary mic, or Interview mode guest audio. To open the Audio Filters window, click the icon in the bottom-right corner of the Sound Levels window, or pick Audio Filters from the Window menu.
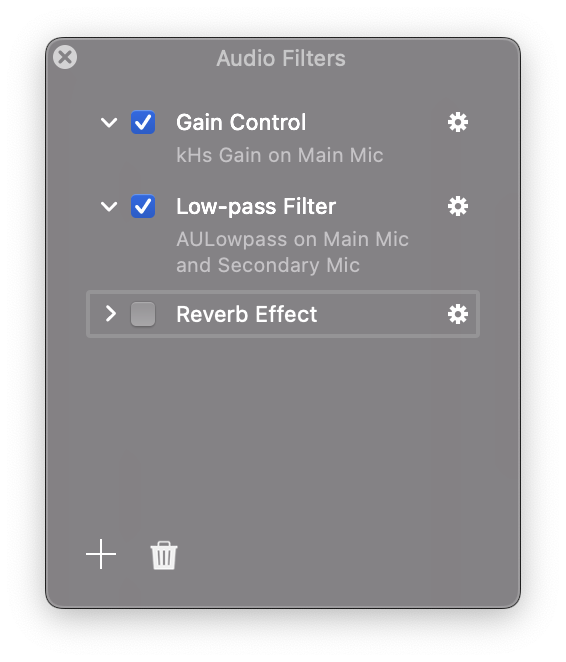
Click the + button to add a new Audio Filter group. In the details popover, select the desired audio channels, and click Add Plugin to add one or more audio plugins.
Hearing Your Audio Filters
To hear the effects of your Audio Filters, connect headphones, and use Ecamm Live’s Audio Monitor feature. (Pick the headphones in the Audio Monitor section of the Outputs menu.)
Audio Warnings
The Sound Levels window can detect several audio misconfigurations and potential echo and feedback. It will display if a possible problem is detected. Click the warning icon for more information about the problem. Possible issues include:
- Echo Issues happen when your Mac’s speaker generates sounds that are then picked up by your microphone. If these sounds are already part of your broadcast, this results in an echo. Possible sound sources are Video File playback, a Interview guest, iOS device playthrough, Sound Effects, and broadcasting System Audio. To prevent this, turn on Echo Cancellation or use headphones rather than your Mac’s speakers.
