Before You Broadcast: A Basic Setup for Facebook Live
At the bottom of the Main Window, in the Destination menu, select Facebook

If you’re logged into Facebook via Ecamm Live already, and your button reads “Go Live”, skip to the next section for more about Setting Where and to Whom You’re Broadcasting.
If you haven’t logged into Facebook through Ecamm Live yet, now is the time. Click the big blue Login button, and follow through the prompts to connect the app to Facebook.
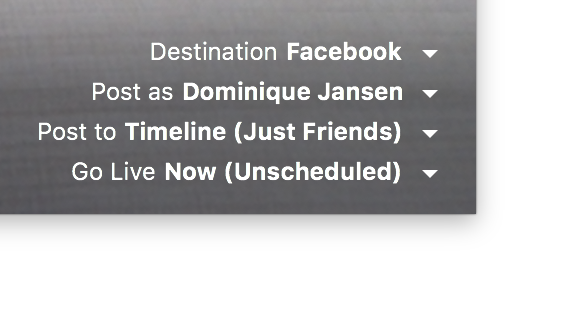
Once you’re logged in, you’re only one click away from your first Facebook Live broadcast. However, you’ll want to verify where and to whom you are broadcasting first. In the bottom right corner, you’ll see a few pull down menus appearing under the Destination menu.
Setting Where and to Whom You’re Broadcasting
Facebook has many areas where you may broadcast, and additional privacy settings available. These menus are dynamic. They change to show you what options you have for each given setting.
-
Destination: — Set to Facebook for this tutorial.
-
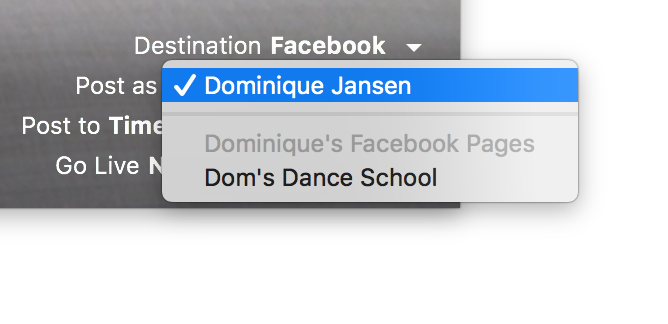
Post as: — here you select whether you post as your personal account, or as a business Page. All business Pages that you administer will be listed here automatically.

-
Post to: — this controls where your Facebook Live broadcast will appear, and your options depend upon who you’re posting as. Options include your Profile, and Groups you administer. Additionally, if you’re posting as your personal account, you’ll see privacy options such as Profile (Just Friends) which allow you to restrict your audience.
-
Go Live: — this controls when your broadcast will post to Facebook. Your choices are Now and New Scheduled Live… For this tutorial, we’ll use Now.
Set these options to your liking. Let’s review a few more settings before clicking Go Live.
Your Video Source
Top center of the Main Window is your source switcher. Your options, left-to-right, are cameras, screen sharing, or local video. For this tutorial, we’ll do a one-camera setup, and we’ll leave the other source options alone for now.
Select the camera icon, if it’s not already. The main window should be your camera’s video. If you have more than one camera attached right now, a Video Source Switcher appears on screen. You can see live previews of video from all available sources. Click a preview to switch to that source. Video sources can be hidden from the switcher. If a source is missing, check the Cameras Menu at the top of your display. Camera menu ➝ Include in switcher ➝ un/check sources listed here.
See also: Video Source Switcher section of our manual
Checking Audio
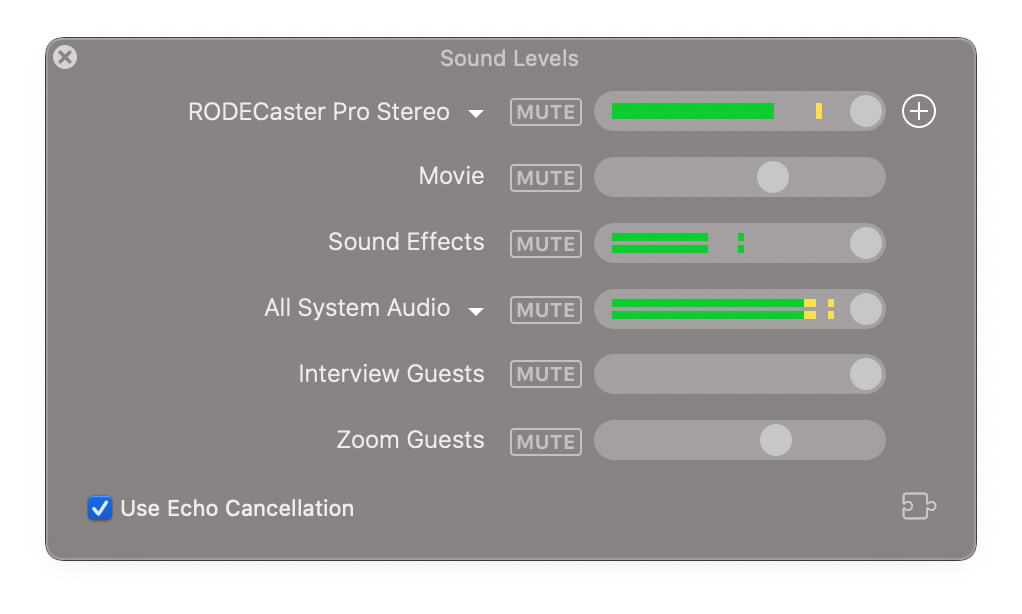
Let’s make sure your audio source is working properly, and make sure your levels are set. If the Sound Levels Window is not visible on screen, click the icon, in the top right of the Main Window to summon it.

The Sound Levels Window will show what audio source is being used. Clicking on the name of the source will display a menu with all available sources. Once selected, a meter will show the source’s volume level. You can adjust this with the slider. Speak to test the levels, and if you see red often at the right end of the meter, adjust the slider knob to the left. If you see little green, slide it to the right to turn up your volume.
There’s a setting for Movie audio. We won’t need that in this tutorial. You should leave Echo cancellation on, if you’re listening to your stream through speakers. Echo cancellation listens to the audio coming through your mic, and cancels it if it believes that audio came from your speakers. If you’re using headphones, this setting doesn’t matter.
Need to mute your microphone? Microphone menu ➝ Mute Microphone, or press shift⌘M.
Overlay and Scenes Windows
You may see an Overlays Window and a Scenes Window. We won’t use these until the end of this tutorial your second broadcast.
Comments and Reactions Window
While you’re broadcasting, if someone in your audience comments or clicks a reaction icon (thumbs up, angry face, etc.) you’ll see a running tally of them here. Place this window somewhere convenient. We’ll look at it again shortly.
